You may have read my YsBox article already. Well, like a good little engineer, I was thinking of ways to boost the performance/efficiency of my original design. Areas of improvement would be graphics performance and cooling efficiency.
Around the middle of my YsBox project, I found out that a low profile Nvidia 9800 GT graphics card was available from Sparkle (SX98GT512D3L-MN).

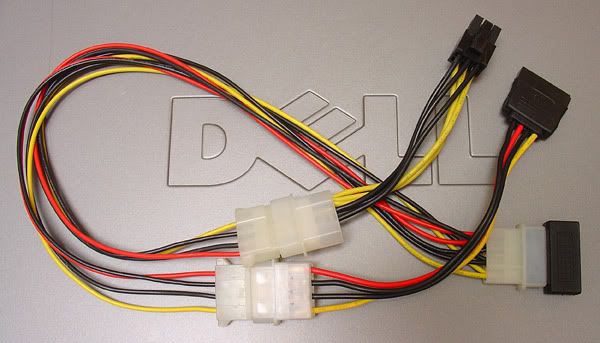
This intrigued me and I purchased one when a decent price surfaced. The power demands on this card are in the ballpark of 100W, which still leaves plenty for the rest of my box, being as I'm running a 35W processor and my power supply is capable of 280W. Cabling posed some issues, as there are no spare power connections coming out of the power supply. Rather than construct a custom cable, I wanted to see if I could come up with an "off the shelf" solution. $12 later I had a harness that would take SATA Power and split it into SATA Power and 6 Pin PCI-E Power.
Unfortunately after solving the power connector dilemma I found some mechanical conflicts. As you can see in the following 2 photo's, the 9800 GT needs to share space with the CPU heatsink shroud.


The following photo indicates (highlighted green) the areas of the CPU heatsink shroud and the 9800 GT's rear heatsink which need "adjusting."

The parts fit beautifully after this adjustment.

Being as the Dell's CPU and 9800 GT's massive heatsink are sharing the same air flow, I wanted to maximize cooling efficiency through the core of the unit. I was troubled by the location Dell chose for the hard drive. It almost completely blocks the main exhaust vent for the system fan.

Hot air from the CPU blows through this area. In leau of protecting the hard drive from this heat, Dell mounted a little blower underneath of the hard drive. Although this may be helpful, I still don't like this setup.

Toward the front of the unit, below the DVD drive, is a 3.5" bay. To my dismay, it is not a standard full depth 3.5" bay, as to allow you to simply move your hard drive down there. I did find it is deep enough to allow for some creative mounting of a 2.5" (laptop) hard drive. There are off the shelf 2.5" to 3.5" mounting kits, but they do not fit properly with Dell's "sled" system. I ended up building a custom hard drive sled and I was quite pleased with the final product. (Note: the outer screws on the sled are only partially threaded in order to slide into the chassis rails properly.)
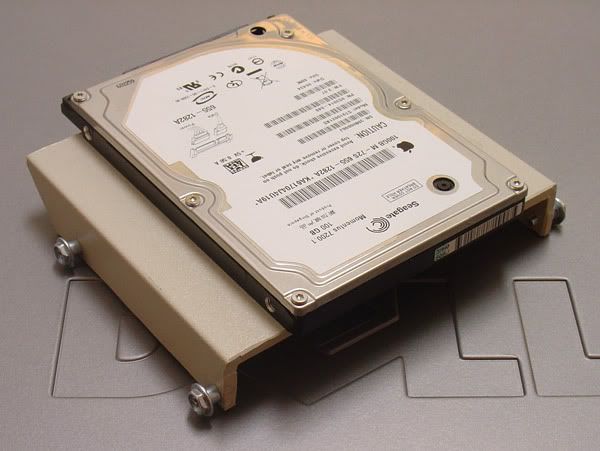
With this neat little conversion I mounted my 2.5" hard drive comfortably out of the area of main air flow. Now the CPU and graphics card have a nice path for air to flow through the core of the system, from the front grill to the rear vents.

I am quite pleased with the final product.

Pricing:
As much as I had certain changes I really wanted to make to the YsBox, I didn't want to do anything that would take what was originally a budget savvy system and turn it into something unreachable for many folks. My upgrade from the YsBox to the YsBox Ultra ended up being about a $100 upgrade.
YsBox Ultra (what I paid, including shipping):
$111.98 - Sparkle Nvidia 9800 GT (Low profile)
$99.74 - Dell Optiplex 745 SFF, w/ DVD drive
$15.00 - Intel Celeron 2.2Ghz 35W CPU
$26.50 - 100GB Seagate 2.5" 7200RPM SATA Hard Drive
$11.95 - Misc. Power Cable Converters/Adapters
$10.44 - Accessory Kit
$275.61 - Total
The Test Drive:
dB rating for this machine is a bit higher than the ~35dB of the original YsBox (under full load, 2 feet away). I'd say it's a fair trade-off for the increase in video horse power
Rather than copy data from my previous article, I thought I'd just make note of the areas I saw noticeable improvement.
In Game Performance:
- Ys: The Oath in Felghana:
(Results @ 1280 x 1024 Resolution, 75 Hz, Maximum Settings, Game Difficulty Normal)
Every part of the game is a solid 75fps (aside from momentary scene loading). - Ys Origin:
(Results @ 1280 x 1024 Resolution, 75 Hz, Maximum Settings, Game Difficulty Normal)
Every part of the game is a solid 75fps (aside from momentary scene loading).
The Linkage:
Dell
Falcom
A nice (albeit more expensive) alternative system for an YsBox is the HP Pavilion Slimline. Here is a thorough investigation/discussion of it. It's key advantages are sleek looks and smaller size (2" shorter)

No comments:
Post a Comment